Loading...
Loading...
Loading...
Loading...
Loading...
Loading...
Loading...
Loading...
Loading...
Loading...
Loading...
Commonly used kernel parameters
microsoft-surface-rt.dtb for APX booting
microsoft-surface-rt-efi.dtb for EFI booting
Specifies the root filesystem which should be used.
/dev/mmcblk0pN eMMC partition N
/dev/mmcblk1pN µSD Card partition N
/dev/sdaN USB partition N
tty0 for normal console (internal screen+tCover/USB keyboard)
ttyS0,115200n8 for serial console at 115200 Baud, no parity bit, 8bits (need uart access)
You can specify multiple console= options on the kernel command line. Output will appear on all of them. The last device will be used when you open /dev/console. So, for example:
defines that opening /dev/console will get you the current foreground virtual console, and kernel messages will appear on both the VGA console and the 2nd serial port (ttyS1 or COM2) at 9600 baud.
Note that you can only define one console per device type (serial, video). - https://www.kernel.org/doc/html/latest/admin-guide/serial-console.html
Waits for root filesystem. Some root filesystems will be mounted after the kernel finished initalizing hardware. Thats the case for USB. eMMC/SD seems to work without this parameter.
EFI doesn't support CPU idle therefore it must be disabled for efi booting. You shouldn't use this param for APX booting.
Boot Linux on Surface RT
UEFI boot gives you instructions on how to boot Linux using the UEFI firmware.
APX boot gives you instructions on how to boot Linux using the fusee gelee exploit. It's more complicated than UEFI boot as you need a second computer with the correct files.
Sometimes you need to edit the preconfigured kernel command line. Kernel parameters will give you a brief overview and tell you possible configuration options.
Boot an EFI-based Linux kernel on your Surface RT.
There is a premade ZIP below.
Most people use UEFI shell to chainload an EFI linux kernel. Using UEFI shell gives the option to easily specify and modify the kernel command line.
Place UEFI shell onto your bootable USB drive (as efi/boot/bootarm.efi) and place the zImage and the tegra30-microsoft-surface-rt-efi.dtb files onto the root of your usb drive.
You will need to create a startup script for UEFI shell:
root=/dev/mmcblk0p2 is a location set to internal storage (eMMC) second partition, set it to this after cloning the installation over to internal storage.
root=/dev/sda2 is a second partition for USB only boot, set it to this if you want to USB boot only
With the USB drive set up, a distro installed and secure boot disabled, you are ready to boot linux.
Shut the device off
Plug in your USB drive
Boot from the USB
Hold the volume down button
Press the power button for a second
Wait until the surface logo appears
Release volume down
You should see kernel logs onscreen (after a short while (15 seconds), wait for 1 minute if nothing happens try again)
With the method shown above, you will need your USB always on hand to boot linux. You can also install these boot files on the internal storage.
The easiest method is to just clean the windows boot files from the EFI partition, and replace them with the contents of your USB drive.
This will make you unable to boot Windows!
It is possible to make Windows and Linux dual-boot. For example, you can use GRUB.
Replace the contents of your startup.nsh on the USB with the following:
After booting, it will copy the devicetree, zImage and the startup-system.nsh over to the EFI partition on the internal storage. Fill your startup-system.nsh with the linux boot commands. (The commands you normally have in your startup.nsh)
This method is also useful for updating the device tree and zImage, if you already have existing linux files there.
A Surface RT with secure boot disabled. Visit for more information on how to disable it.
A USB drive, formatted as FAT32 with either MBR or GPT. The partition doesn't require being marked as EFI system partition. Be aware that .
A root filesystem/distro on your SD card (recommended)/internal storage/USB. See .
There are .
You may want to use different bootloaders, like .
You may want to change the line that begins with zImage. It is the kernel command line. root=/dev/mmcblk1p2 is the second partition of the sdcard, change this if you want to use a different device/partition. is a recommended distro, as it runs smooth
See for further information.
Extract this ZIP to your USB, and add your zImage and device tree to it. You can find precompiled binaries .
If you have any issues, feel free to contact us on .
Boot linux on your Surface RT using the Fusée Gelée exploit.
APX booting is for advanced users. Visit the main Linux page for a short comparison between EFI vs. APX Linux
You should read all the the sub-sections before you start. The subsections are logical ordered from top to bottom
Get the latest and tested Devicetree for APX boot.
As we bypass all the firmware with APX boot, someone needs to setup memory and load Linux. Uboot is used for this.
Get prebuilt binaires for Das U-Boot if you don't want to compile it yourself.
Get a Linux kernel for APX.
Linux without any root filesystem is useless for the end-user. Get instructions on how to get one.
Fusée Gelée is the exploit used to bypass the security checks for APX mode. Get information on how to execute the exploit in order to boot linux.
Booting linux with APX mode is rather complicated. You can find a little summary and final instructions here:
U-Boot for Surface RT.
You can use U-boot for tegra
git clone https://github.com/OE4T/u-boot-tegra; cd u-boot-tegra
or U-boot Mainline
git clone https://gitlab.denx.de/u-boot/u-boot.git; cd u-boot
THIS IS VERY IMPORTANT!!! If you skip this step you can damage your device Use the devicetree below. Don't use the devicetree from Linux.
Replace the content of ./arch/arm/dts/tegra30-cardhu.dts with following code:
Now you can build U-Boot:
make cardhu_defconfig
make ARCH=arm CROSS_COMPILE=arm-linux-gnueabihf-
Now you should find the file./u-boot-dtb-tegra.bin
This your Uboot Image which contains the SPL and Uboot.
Booting Linux from UART is tedious and you may don't have UART access. To automate the boot process a boot script can be used. Create a file:
Compile it using:
mkimage -A arm -O linux -a 0 -e 0 -T script -C none -n "SurfaceRT Boot Script" -d boot.script boot.scr
Place boot.scr on the SD Card next to the kernel.
Tip: Don't hit any key to stop autoboot
BootConfigTable for the Surface This defines SDRAM configuration, as well as bootloader location. Described here (with compiler / decompiler)
Send and launch fusee exploit binary over usb, using python script.
Send and launch custom bootloader binary over usb, using modified NvFlash to bypass security checks.
(Experimental) Loading a bootloader binary and executing at specific memory address by adding --setentry 0x80808000 0x80808000 before --bl. 0x80808000 for example, is the memory address for the factory UEFI SPI-Flash bootloader. The factory bootloader binary is obtained by using the decryption script with the relevant SBK and dump of the SPI-Flash memory.
Boot Linux on Surface RT. Setup is a bit tedious but once the setup is complete it is very easy to use.
To boot Linux on Surface RT we use the Fusée Gelée cold boot exploit. See Fusée Gelée for further information.
Read all pages of the Linux topic carefully before you try to boot Linux
Extract BCT from your device
Build U-Boot with correct devicetree
Create a U-Boot boot script
Build Linux with correct devicetree
Build Root Filesystem for ARM32
Create/Get BootToolChain
Place zImage, devicetree and boot.scr on first partition
extract rootfs.tar on second partition
Insert SD Card into the SurfaceRT
Go to to your BootToolChain directory
place your U-Boot 'u-boot-dtb-tegra.bin' in ./u-boot
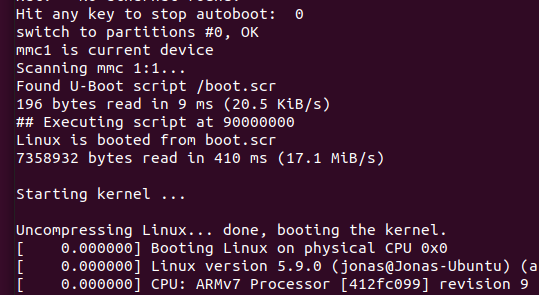
If you have UART access you should see U-Boot boot process
Linux should be booted and be accessible via UART and/or show HDMI/Screen Console
Enjoy and fix issues.
If you have UART access you should see U-Boot boot process
Linux should be booted and be accessible via UART and/or show HDMI Console
Enjoy and fix issues.
At the moment both UHS-I SD cards and non UHS Cards are supported. UHS Cards operate at higher speeds and use 1.8V instead of 3.3V. (1.8V now works, we found LDO5 in the PMIC which handles SD signaling voltage)
The left SanDisk Card is UHS-I (SDXC-I) and has SpeedClass 3 (3 in U) and VideoClass30 (V30) See https://www.sdcard.org/developers/overview/bus_speed/index.html The right (Intenso) Card is an old Class10 (10 in C) SD card which works.
Use GParted or similar tool to create 2 partitions on your SD Card. First partition FAT16/32 - 255MiB Second partition EXT4

